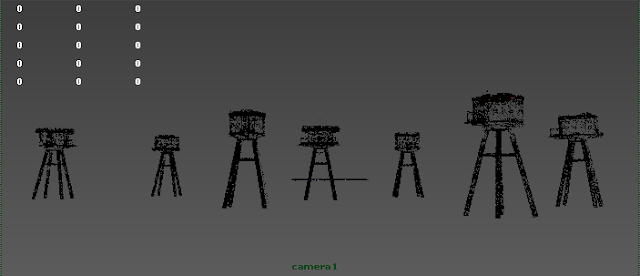
Render of the seaforts fully lit.
In order to create realistic shadow that mimics the position of the sun, I decided to put in a 'point light' in the scene right in front of the sun on the 'skydome'. However, in order to reduce the render time, I placed a 'spot light' near the same area as a photon emitter for global illumination. I also reduced the intensity of the 'spot light' to zero so it doesn't add any unnecessary lights into the scene.
With the help of some third year students we have finally discovered the best HDR image that we would like to use for our render as images shown above. We used the chosen HDR image and played around with the settings a bit more, trying to create the best render result under the minimum amount of render time.
Through tutorials, we discovered various techniques of rendering in Mental Ray efficiently. Things like a 'photon map' (Image Above) with 'Map Visualiser' for example, this allows Maya to re-use the photons generated from previous renders. This allows Maya to skip the process of calculating the photons in every render and reduce the render time, as long as certain settings remain the same.
We also experimented with a few other HDR images that we can find to give different looks and atmospheres.
We then lit up the scene with the HDR image of the sky that we would like to use, but the lighting created via this image felt less effective than the previous one.
Despite, the nice looking renders, we feel that the colours of the sky from this HDR image is too mellow and does not achieve the kind of atmosphere we are looking for. So we replaced the sky with another image that we feel is closer to our goal and turned off the 'primary visibility' of the HDR image from its render stats. As a result, the lighting of the scene and colours of the sky do not match up as the image shown above.
Both images above were lit with the HDR image shown below. Through the reflection of light and colours, the scene already looks pretty nice with a few simple settings. However, image based lighting does require the activation of 'Mental Ray' and 'Final Gathering'. As a result, the render time does increase significantly depending on the settings.
HDR Maps - 3DTeachers.com
I came across the image above on the Internet while researching into HDRI. This could be a good example of the kind of HDR image that we might want to use regarding the lighting inside the seafort. However, it is very difficult to find a HDR image that is as specific as the way we want it, which is a military office inside a seafort. As a result, direct lighting with Maya is still the prior option for now.
Information from these links, a tutorial about HDRI and some demonstration from a couple of third year students provided me with a great understanding of HDRI and how it could be used in this project.
HDRI stands for High Dynamic Range Image, which is basically an image that consists a huge amount of colour data that is generated via taking photos of the same scene at multiple exposures and then combining them into a single image. Compare to a normal 8 bit image such as .jpg or .tiff, a HDR image has 32 bit of colour information stored in it. With these extra colour information, it allows 3D programs to closely mimic how the lights behave in real life and hence generate photo-realistic renders.
If we could find a HDR image that is generated from a scenery of dusk, which is how our weather condition is like, that would be incredibly efficient when it comes to lighting up the first scene with all the sea forts. However, it is still crucial to play around with direct lighting and global illumination in Maya since another side of the scene should be stormy.
Photographing this kind of light probe is one method of creating a HDR image. The benefit of this is that it captures a larger range of the scene due to its reflection property. However, there are problems such as having to remove the photographer in the reflection and the base of the tripod before the image can be used. Also, the scratches and reflectivity of the surface would also effect the image quality.
One may also use a fish-eye lens to achieve the similar effect though it does not capture as much of the scene as a light probe does. However, this does avoid the problem of capturing the photographer and the tripod base in the image, as well as the distortion caused by the light probe surface.
For our project we are going to try and find a pre-made HDR image for our scene.
Poolball Texturing Interview (Wide3D.no)
Above image has been unwrapped into a flat image from spherical image taken through a light probe. As a result, Maya will wrap that image around a dome and project light into the scene according to the position of light sources and the exposure data stored in the image.
Above image is a comparison of a pool-ball that is lit with and without an HDR image. The result of photo-realisim achieved via HDRI lighting demonstrates that why it has been used widely to composite CGI with real life footage.
from Max-Realms.com


No comments:
Post a Comment